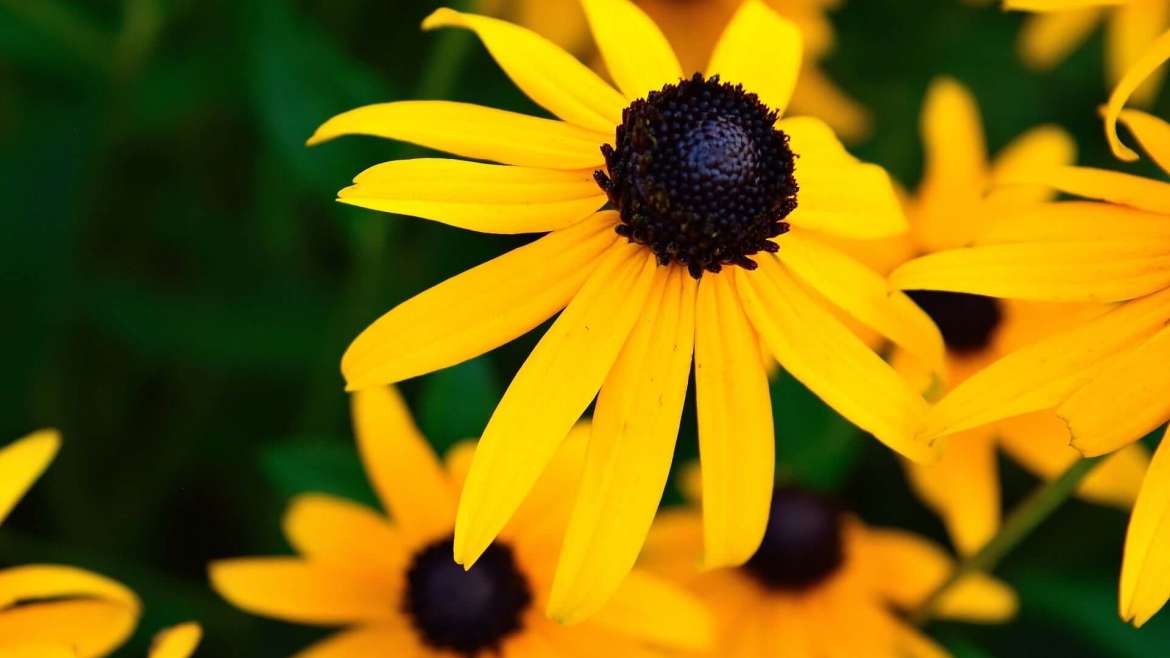
Growing Black-Eyed Susan offers vibrant, long-lasting blooms that attract pollinators like bees and butterflies, enhancing the beauty and biodiversity of your garden.
Black-Eyed Susan. Sounds like a character from a Western, right? But trust me, this is one plant you’ll want to get to know. With its vibrant yellow petals and dark center, it’s the type of flower that screams “Look at me!” without being obnoxious about it. Native to North America, it’s as tough as nails, thriving in everything from sun-baked gardens to wildflower meadows, and it doesn’t mind a little drought either.
If you’re into low-maintenance beauty, this is your plant. Toss it in the ground, give it a bit of water (especially when it’s young), and let it do its thing. No fancy care instructions needed here. The bees, butterflies, and birds will thank you, too—they love hanging around Black-Eyed Susan as much as we do.
And let’s talk about blooms. These flowers don’t just pop up and disappear in a week. They stick around for the whole summer, giving you that golden burst of color right when you need it most. Bonus: They’re hardy perennials, so they’ll come back year after year, making you look like a gardening genius without any extra effort.
The plant itself? Tough, resilient, and with that touch of wild charm that makes you want to sit on your porch with a glass of lemonade and admire it. It’s the kind of flower that makes you feel like you’ve got your life together.
How to Grow Black-Eyed Susan

Growing Black-Eyed Susan is relatively easy and rewarding, as these vibrant flowers add a pop of color to any garden.
Planting Black-Eyed Susan
- Choosing a Location:
- Sunlight: Black-Eyed Susans thrive in full sun but can tolerate partial shade. Aim for at least 6 hours of direct sunlight daily.
- Soil: They prefer well-draining soil. They can grow in a variety of soil types, including clay, but they do best in slightly acidic to neutral soil (pH 6.0-7.0).
- Planting Time:
- Seeds: Sow seeds directly in the garden in spring or early summer after the last frost.
- Transplants: You can also plant young plants or transplants in the spring.
- Planting Process:
- Seeds: Scatter seeds on the soil surface and lightly cover with a thin layer of soil (about 1/8 inch). Water gently.
- Transplants: Dig a hole slightly larger than the root ball, place the plant in the hole, and backfill with soil. Water thoroughly.
Growing Black-Eyed Susan
- Watering:
- Water newly planted seeds or transplants regularly until established. Once established, they are drought-tolerant and require only occasional watering.
- Mulching:
- Apply a layer of mulch around the plants to retain moisture, suppress weeds, and keep the roots cool.
- Fertilizing:
- Black-Eyed Susans are low-maintenance and usually don’t require fertilization. However, if your soil is poor, you can apply a balanced, slow-release fertilizer in the spring.
- Pruning:
- Deadhead spent flowers regularly to encourage continuous blooming and prevent self-seeding (unless you want them to spread).
Caring for Black-Eyed Susan
- Overwintering:
- In colder climates, you can cut the plants back to the ground after the first frost or leave the seed heads for winter interest and wildlife. Mulch around the base to protect the roots.
- Pests and Diseases:
- Black-Eyed Susans are generally resistant to pests and diseases. However, they can occasionally suffer from powdery mildew, rust, or aphid infestations. Ensure good air circulation and avoid overhead watering to prevent fungal issues.
- Dividing:
- Every 3-4 years, divide the plants in early spring or fall to prevent overcrowding and promote healthy growth.
- Self-Seeding:
- If you allow some flowers to go to seed, Black-Eyed Susans will often self-seed and return year after year. Keep this in mind if you want to control their spread.
Black-Eyed Susan Growing Zone
Black-Eyed Susans (Rudbeckia hirta) are hardy, versatile plants that can grow in USDA hardiness zones 3 through 9.
This wide range means they can thrive in a variety of climates across the United States, from cooler northern regions to warmer southern areas.
Growing Black-Eyed Susan FAQ
Black-Eyed Susans can be planted from seeds or nursery plants. Plant seeds in the spring, lightly covering them with soil. If planting nursery plants, dig a hole slightly larger than the root ball, place the plant in the hole, and fill it with soil. Water thoroughly after planting.
The best time to plant Black-Eyed Susans is in the spring after the last frost or in the early fall. Planting in early fall gives the plants time to establish roots before winter.
Black-Eyed Susans prefer moderate watering. Water them deeply once a week, allowing the soil to dry out slightly between waterings. They are drought-tolerant once established but perform best with regular moisture.
Black-Eyed Susans can be propagated by seed, division, or cuttings. Division is best done in early spring or fall, while seeds can be collected from mature flower heads in the fall and planted in the spring.
While Black-Eyed Susans can self-seed prolifically, they are not considered invasive. However, they can spread in garden beds if not managed. Deadheading and dividing plants can help control their spread.
Yes, Black-Eyed Susans can be grown in containers, provided the pots have good drainage and are large enough to accommodate the plant’s root system. Ensure the plants receive full sun and water them regularly, as containers can dry out more quickly than garden beds.
Sign up to get our FREE weekly emails
Gardening guides, tips, & videos delivered right to your inbox!