Picture this: it’s an early spring morning, and the soil smells like rain and dark chocolate. You brush past rosemary that releases a piney perfume, pick a warm strawberry at your feet, and look up to see pears blushing in dappled light. No weekly tilling. No hunger-gap panic. Just steady, low‑maintenance abundance.
That’s the promise of a food forest—a layered, perennial garden modeled after young woodland edges. In these recent years, with weather swings and grocery prices keeping us on our toes, more gardeners are replacing lawns and annual-only beds with resilient perennial polycultures that feed people and soil life.
This guide distills field‑tested practices used by permaculture designers, agroforestry educators, and home gardeners so you can start a food forest in 10 easy steps—no degree required.
What Is a Food Forest? (And Why It Works)

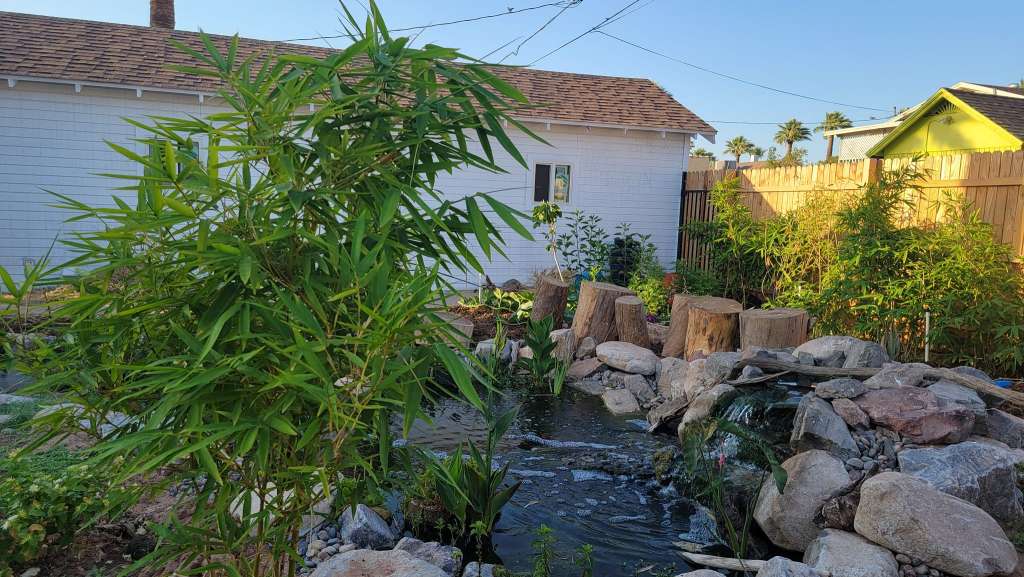
A food forest (aka edible forest garden) stacks crops vertically and functionally, creating a mini‑ecosystem where each layer supports the next:
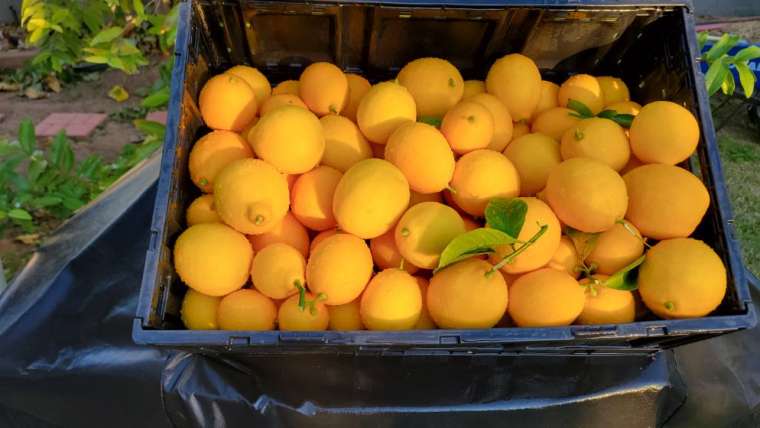
- Canopy: full‑size fruit/nut trees (e.g., chestnut, apple)
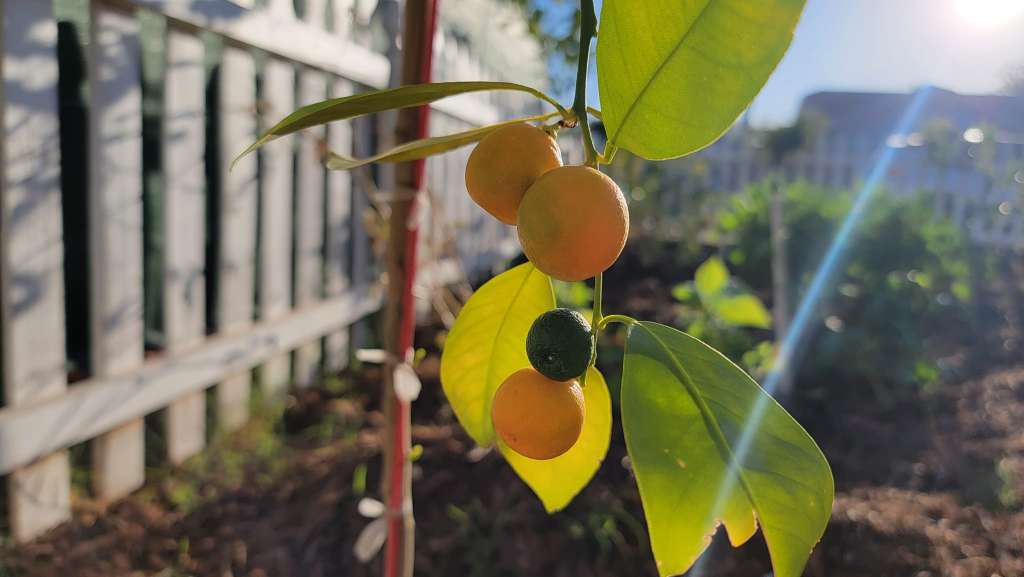
- Sub‑canopy: smaller or dwarf fruit trees (plum, citrus, peach)
- Shrub: berries and nitrogen fixers (blueberry, elderberry, goumi*)
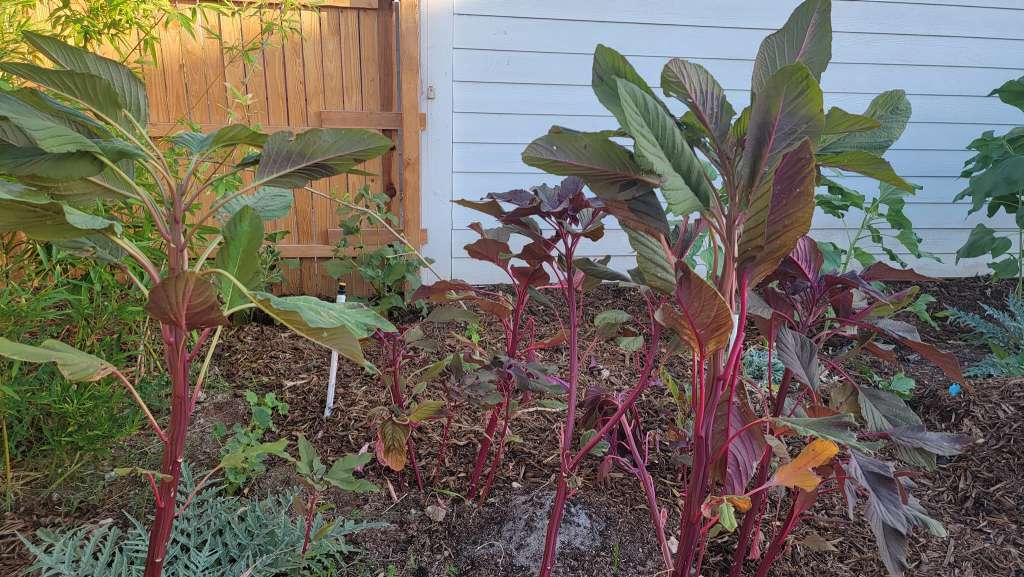
- Herbaceous: culinary and medicinal herbs (chives, mint, comfrey)
- Groundcover: living mulches (strawberry, clover)
- Root: edible/beneficial roots (garlic, sunchoke)
- Vine: climbers (grape, hardy kiwi)
- Fungi (bonus layer): cultivated mushrooms (wine cap)
The magic? Diversity + structure. Deep roots mine minerals, canopy breaks wind, groundcovers shade soil, and flowers feed beneficial insects. The result is fewer pests, richer soil, steadier moisture, and a harvest spread across seasons.
How to Start a Food Forest in 10 Easy Steps
Step 1 — Define Your Vision & Site Goals (Food Forest Design Basics)
Before you touch a shovel, decide what “success” looks like:
- Purpose: fresh fruit for kids? preserves? wildlife habitat? privacy screen?
- Scale & budget: 200 sq ft city nook or ¼‑acre suburban yard?
- Time horizon: quick wins (berries/herbs year 1–2) vs. long‑term (nuts 5–10 years).
- Maintenance bandwidth: honest hours you can give per week.
Pro tip: sketch a one‑sentence goal. “Create a 400 sq ft backyard food forest that yields berries in year 1, apples in year 3, and needs <1 hour/week.”
Common mistake: planting whatever looks pretty without a plan for spacing, water, or long‑term canopy size.
Step 2 — Read the Site (Sun, Wind, Water, Soil)
Spend a week just observing.
- Sun: note hours of direct sun through the day (most fruit needs 6–8).
- Wind: find channels and winter exposure; plan windbreaks if needed.
- Water: watch where rain lingers or rushes.
- Soil: do a quick jar test for texture and a pH/NPK lab test if possible. Note drainage: dig a 12″ (30 cm) hole, fill with water, time the drain.
- Microclimates: warm walls, frost pockets, soggy dips—these guide plant placement.
Pro tip: mark high‑traffic routes. You’ll design paths first so you never step where you’ll plant.
Step 3 — Map the Layout (Zones, Sectors & Paths)
Draw a base map (graph paper or a simple app) showing house, fences, utilities, trees, and the sun path.
- Zones: keep high‑visit plants (herbs, salad greens, strawberries) near entrances; long‑term trees a bit farther.
- Paths: lay 3–4 ft (0.9–1.2 m) wide loops for easy wheelbarrow access. Mulch them to define “no‑compaction” beds.
- Spacing (cheat sheet):
- Standard apple/pear: 15–20 ft (4.5–6 m) apart
- Dwarf apple/pear: 8–12 ft (2.4–3.6 m)
- Peach/nectarine: 12–18 ft (3.6–5.5 m); dwarf 8–12 ft
- Citrus dwarf: 6–10 ft (1.8–3 m); standard 12–20 ft (3.6–6 m)
- Blueberries: 4–6 ft (1.2–1.8 m)
- Currants/gooseberries: 3–5 ft (0.9–1.5 m)
Common mistake: cramming trees. Overcrowding steals light, air, and nutrients—and adds disease pressure.
Step 4 — Slow, Spread & Sink Water (Rain‑Wise Setup)
Water is design priority #1.
- Catch: rain barrels at downspouts; cisterns if budget allows.
- Spread: shallow on‑contour swales, mulch basins, or gentle berm‑and‑basin around trees.
- Sink: thick wood‑chip mulch; compost‑rich soils that hold moisture.
Rule of thumb: 1″ of rain on 1 sq ft = ~0.623 gallons.
So a 500 sq ft patch collects about 311 gallons per inch of rain—plenty to hydrate a young guild.
Safety note: avoid directing water toward foundations or neighbors. Always plan overflow routes.
Step 5 — Build Living Soil (Sheet Mulch & Biology)
Great food forests grow from the ground up.
- Scalp weeds/grass low; leave roots to rot in place.
- Cardboard (no glossy inks) overlapped 6–8″ (15–20 cm), well‑soaked.
- Compost layer 1–2″ (2.5–5 cm) to feed microbes.
- Wood chips 4–6″ (10–15 cm) as mulch (keep 3–6″ away from trunks).
- Inoculate with mycorrhizal fungi (optional) and sprinkle a diverse cover‑crop seed mix where you won’t plant immediately.
Add biochar charged with compost tea if you have it; it’s like a condo complex for microbes.
Common mistake: “volcano mulching” up tree trunks—this invites rot and rodents. Keep the root flare visible.
Step 6 — Choose Plants for All Layers (Climate‑Smart Picks)
Mix resilient natives with proven edibles. Match species to your USDA/zone or local climate.
Temperate ideas
- Canopy: apple, pear, chestnut
- Sub‑canopy: plum, serviceberry, dwarf peach
- Shrub: blueberry (acidic soil 4.5–5.5), currant, aronia
- Herbaceous: comfrey (dynamic accumulator), chives, yarrow, mint*
- Groundcover: strawberry, white clover, creeping thyme
- Root: garlic, sunchoke (contain it)
- Vine: grape, hardy kiwi
- Fungi: wine cap (Stropharia) on chips
Mediterranean/Arid ideas
- Canopy: olive, carob
- Sub‑canopy: pomegranate, fig
- Shrub: rosemary, lavender, sea buckthorn (check invasiveness)
- Herbaceous: oregano, sage, chamomile
- Groundcover: creeping rosemary, purslane
- Root: garlic, sweet potato (with summer irrigation)
- Vine: grape
Subtropical ideas
- Canopy: mango, breadfruit (frost‑free only)
- Sub‑canopy: citrus, guava
- Shrub: hibiscus sabdariffa (roselle), Surinam cherry
- Herbaceous: lemongrass, turmeric
- Groundcover: sweet potato, perennial peanut (nitrogen fixer)
- Vine: passionfruit
*Mint spreads; confine with edging or pots sunk in the ground.
Nitrogen fixers to interplant and “chop‑and‑drop”: white clover, lupine, bush pea, alder, mesquite (arid), and select non‑invasive Elaeagnus varieties where appropriate.
Step 7 — Build Tree Guilds (Companion “Teams” That Work)
Pick an anchor tree and surround it with allies that mine nutrients, attract pollinators, repel pests, and keep soil covered.
- Apple guild example (temperate): Apple (anchor) + comfrey (potassium accumulator & mulch source) + chives/garlic (pest confusion) + yarrow (beneficial insect nectar) + white clover (nitrogen) + strawberry (groundcover) + currant (shrub layer) + daffodils (rodent‑resistant bulb ring).
- Citrus guild (warm): Citrus + sweet alyssum & calendula (predator habitat) + nasturtium (living mulch) + perennial peanut (nitrogen) + rosemary (aromatic pest deterrent).
Pro tip: plant flowering allies for a full bloom calendar from early spring to late fall so beneficial insects never go hungry.
Step 8 — Planting Day (Do It Once, Do It Right)
- Time it: plant trees in dormant season (fall or early spring); shrubs/herbs when frost risk passes.
- Dig right: a hole 2–3× wider than the root ball, no deeper than the root flare. Loosen sides.
- Set the tree: root flare at or slightly above grade.
- Backfill & water in: mix native soil with a bit of compost; water thoroughly to settle.
- Mulch donut: 3–4″ (7–10 cm) deep, pulled back from the trunk.
- Stake in windy sites only (remove after a year).
- Guard: tree shelters or hardware cloth if you have deer, rabbits, or weed‑whacker habits.
Common mistake: burying graft unions. Keep the graft 2–4″ (5–10 cm) above soil/mulch.
Step 9 — Irrigate & Protect (Year 1–2 Care)
Young trees want consistent moisture.
- Drip or soaker hose on a timer is your friend.
- Rule of thumb: 5–10 gallons/week per young tree in hot, dry spells; adjust to soil and weather.
- Re‑mulch annually; keep adding organic matter (leaves, wood chips).
- Integrated Pest Management: scout weekly; prune for airflow; encourage predators with flowers; spot‑treat problems early with least‑toxic controls.
Pro tip: cluster thirsty plants near water sources and drought‑tough species at the edges.
Step 10 — Maintain for Abundance (Chop‑and‑Drop, Prune, Succession)
- Chop‑and‑drop legumes and comfrey 2–4× per season to feed the soil.
- Prune during dormancy (structure) and lightly in summer (sunlight & airflow).
- Thin fruit on heavy‑set varieties to prevent branch breakage.
- Refresh mulch to 3–4″ each spring.
- Succession‑plan: as the canopy closes, shift sun‑lovers to edges and bring in shade‑tolerant berries and herbs beneath.
A Simple 3‑Year Timeline
- Year 1: install paths, water‑harvesting, mulch; plant anchors + shrubs + some herbs. Expect herbs and berries to yield.
- Year 2: fill gaps with groundcovers, vines, and additional shrubs; first light crops on dwarf fruit trees.
- Year 3: structural pruning; canopy begins to knit; yields jump; maintenance drops to routine mulching, light pruning, and harvesting.
Quick Planting Density & Sunlight Guide
- Full sun (6–8 hrs): most tree fruits, grapes, blueberries.
- Part shade (3–5 hrs): currants, gooseberries, elderberry, many herbs, salad greens in summer.
- Densities: aim for 40–60% ground covered in year one, 80–90% by year three to suppress weeds and stabilize moisture.
Common Mistakes to Avoid

- Planting invasive species—always check your local lists.
- Mulch piled against trunks (rot risk).
- Overcrowded trees (disease, low yield).
- No water plan (young trees fail without steady moisture).
- Ignoring sun/wind patterns (sad fruit, broken branches).
- Neglecting airflow (fungal disease loves still, damp foliage).
- Skipping soil prep and expecting fertilizers to fix structure.
Real‑Life Examples (Small, Medium, Large)
- Small urban nook (~150 sq ft): 1 dwarf apple on M‑26, 2 blueberries, 2 currants, groundcover of strawberry and thyme, chive/garlic ring, wine cap chips in paths.
- Suburban side yard (~400 sq ft): 2 dwarf apples + 1 plum, 4 blueberries, 3 gooseberries, comfrey patches, clover living mulch, grape on an arbor over the path.
- ¼‑acre corner: 3 canopy (apple, pear, chestnut), 4 sub‑canopy (plum, peach, fig, serviceberry), 12 shrubs (blueberry/aronia/elder), herb meadows, clover understory, grape/kiwi trellis, rain‑garden basin.
FAQ: Food Forest Questions People Ask Most

An orchard is usually rows of single‑species trees on bare ground or grass. A food forest stacks multiple layers—trees, shrubs, herbs, groundcovers, vines, and fungi—so the system is more self‑mulching, biodiverse, and low‑maintenance over time.
You can harvest herbs and greens right away, berries in year 1–2, dwarf tree fruits by year 2–3, and standard trees by year 3–5+, depending on rootstock and care.
Absolutely. A single guild around one dwarf fruit tree can fit in 8–10 ft (2.4–3 m) of space, with berries and herbs layered around it.
No. Food forests are typically no‑dig. Use sheet mulching to smother sod and feed soil life without disturbing structure.
A modest 300–500 sq ft install can range from $200–$1,000+ depending on plant sizes, irrigation, and whether you source chips/leaves free from arborists and neighbors.
Design for diversity and airflow, keep mulch off trunks, and scout weekly. Plant pollinator strips and aromatic herbs; invite predators like lady beetles and lacewings.
Thick mulch and habitat attract life. Keep mulch pulled back from structures, use trunk guards, and maintain clear paths to reduce hiding spots near the house.
Not required, but mixing nitrogen‑fixing shrubs/groundcovers (clover, lupine, perennial peanut) can reduce fertilizer needs and turbocharge growth.
Start‑up watering is essential the first 1–2 years. Once established with deep mulch and good soil, water needs drop significantly, especially compared to annual beds.
Check regional invasive species lists via your local extension service or native plant society, and choose regional‑appropriate alternatives.
Quick‑Start Checklist
- Define goals, size, budget, time
- Observe sun/wind/water/soil for a week
- Map base plan; set paths and bed edges
- Install rain barrels/swales; plan overflow
- Sheet mulch: cardboard → compost → wood chips
- Choose climate‑fit plants for all layers
- Design guilds around anchor trees
- Plant correctly (root flare, mulch donut)
- Set drip/soaker; tree guards; scout weekly
- Prune, chop‑and‑drop, re‑mulch each season
Conclusion: Your Backyard, Rewilded (and Delicious)
A food forest is less a project than a friendship with your land. Start simple, stack layers slowly, and let diversity do the heavy lifting. In a couple of seasons, you’ll be strolling shaded paths, brushing against thyme and basil, and harvesting fruit with birdsong for company.
If you found this guide helpful, drop your questions in the comments—I answer them. Want seasonal checklists, plant pairings, and design templates? Join the newsletter and get the free “One‑Guild Starter Plan” delivered to your inbox.
Sign up to get our FREE weekly emails
Gardening guides, tips, & videos delivered right to your inbox!