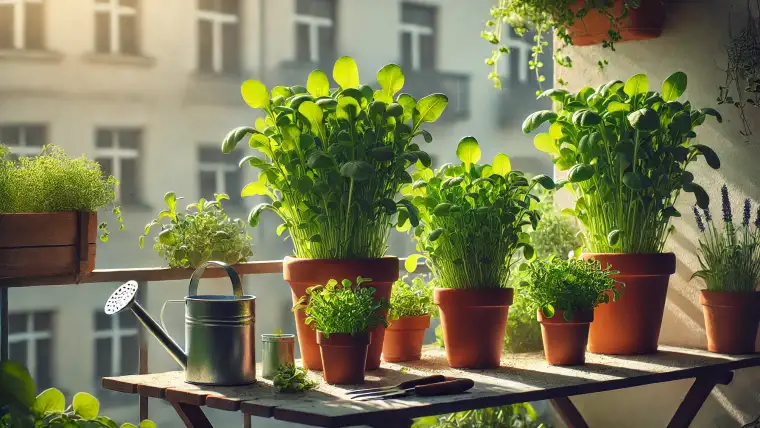
Growing foxgloves in pots offers so many advantages for both new and experienced gardeners. First, pot cultivation allows for better control over soil quality and drainage, which is essential for the health of these plants that prefer well-drained conditions.
Additionally, pots can be placed in optimal sunlight locations, ensuring the foxgloves receive the right amount of light while also making them easily accessible for maintenance. This way of growing also provides flexibility in garden design, allowing for creative arrangements and the ability to move the plants as needed to enhance the aesthetic appeal of patios, balconies, or garden spaces.
Furthermore, container gardening can help mitigate issues with pests and diseases, as the confined space allows for easier monitoring and management. Overall, growing foxgloves in pots not only enhances their growth potential but also adds beauty to any outdoor setting.
How to Grow Foxgloves in a Pot
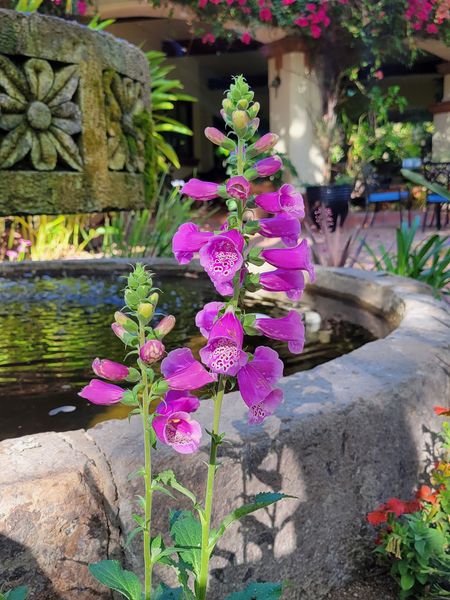
Foxgloves are known for their tall spires of bell-shaped flowers, which make a bold statement in any garden. With the right care, they can also thrive in pots, adding charm to patios, balconies, or small gardens.
We prepared this guide so it walks you through everything you need to know about growing foxgloves in containers.
1. Choosing the Right Variety
While most foxgloves grow tall, some varieties are better suited for pots due to their more compact nature. Look for varieties like:
- ‘Dwarf Dalmatian’ series – Compact and blooms in the first year.
- Digitalis lutea – Smaller flowers and shorter height.
- ‘Foxy’ or ‘Candy Mountain’ series – Early flowering and less tall, ideal for containers.
2. Selecting the Right Container
- Size: Choose a pot that’s at least 12-16 inches in diameter and 10-12 inches deep to accommodate their roots and prevent overcrowding.
- Material: Terracotta pots allow better air circulation but dry out faster; plastic pots retain moisture better.
- Drainage: Ensure the pot has drainage holes to prevent waterlogging, as foxgloves dislike soggy roots.
3. Best Soil for Foxgloves in Pots
- Use lightweight, well-draining potting soil mixed with organic matter like compost.
- To improve drainage, add perlite or grit to the soil mix.
- Foxgloves prefer slightly acidic to neutral soil (pH 6.0–7.0).
4. Planting Foxglove Seeds or Seedlings
- From Seeds:
- Sow seeds in early spring or late summer.
- Sprinkle them lightly on the soil surface (do not cover with soil, as they need light to germinate).
- Keep the soil moist and place the pot in a bright, indirect light location.
- Germination takes 2-3 weeks.
- From Seedlings:
- Transplant seedlings or young plants carefully without disturbing the roots.
- Space multiple plants in a large container, leaving 6-8 inches between each.
5. Light and Temperature Requirements
- Light: Foxgloves thrive in partial shade or dappled sunlight. Too much direct sunlight can scorch the leaves, especially in warmer climates.
- Temperature: They prefer cool conditions and grow best in temperatures between 60-75°F (15-24°C). Protect them from extreme heat.
6. Watering and Feeding
- Watering: Keep the soil evenly moist but not waterlogged. Water thoroughly when the top inch of soil feels dry.
- Fertilizer: Use an organic liquid fertilizer every 3-4 weeks during the growing season. Avoid over-fertilizing, which can result in more leaves and fewer flowers.
7. Supporting the Plants
- Tall foxglove varieties may need staking to keep the flower spikes upright. Insert stakes early to avoid damaging the roots later.
- Rotate the pot periodically to encourage even growth and prevent the plant from leaning toward the light source.
8. Deadheading and Pruning
- Deadhead spent flowers by cutting the stalk just above the rosette of leaves to encourage more blooms.
- Leave some flower spikes intact if you want the plant to self-seed.
- Remove any yellow or dead leaves to maintain a neat appearance and prevent disease.
9. Overwintering Potted Foxgloves
Foxgloves are biennial or short-lived perennials, meaning they grow foliage the first year and flower the next. To overwinter:
- Move pots to a sheltered spot (like an unheated greenhouse or porch) if temperatures drop below freezing.
- Cut back the flower stalks after blooming if you want the plant to focus on root development.
- Water sparingly during winter, just enough to keep the soil from drying out completely.
10. Pests and Diseases
- Aphids and spider mites: Spray with insecticidal soap or neem oil.
- Powdery mildew: Ensure good air circulation around the plants and avoid overhead watering.
- Crown rot or root rot: Avoid overwatering and ensure proper drainage to prevent these issues.
11. Foxgloves and Safety Tips
- Toxicity: All parts of the foxglove plant are highly toxic if ingested, so take care if you have pets or children.
- Use gloves when handling foxgloves, as the sap may cause skin irritation.
12. Blooming Time and Aftercare
- Foxgloves typically bloom in late spring to early summer.
- After the flowering period, the plant may go into dormancy or die back. If they self-seed, you’ll have new plants sprouting the following year.
- If you want continuous blooms, consider planting foxgloves in succession throughout the growing season.
FAQ
Yes, foxgloves grow well in pots as long as the container is large enough to support their tall growth and deep roots.
A well-draining potting mix with compost is ideal. Avoid heavy, waterlogged soil to prevent root rot.
Keep the soil evenly moist but not waterlogged. Water when the top inch feels dry, especially during hot spells.
Foxgloves are usually biennials. They grow foliage in the first year and flower in the second, though some hybrid varieties can bloom the first year.
Support tall plants with stakes or a plant support ring to keep them upright, especially during windy conditions.
Foxgloves prefer outdoor conditions. If grown indoors, place them near a bright, cool window and provide good airflow.
Yes, all parts of the foxglove plant are toxic if ingested. Keep them out of reach of pets and children.
Cut back the flower stalks to encourage new shoots. If you want them to self-seed, leave some seed heads intact.
Sign up to get our FREE weekly emails
Gardening guides, tips, & videos delivered right to your inbox!